Import Users
Administrators can import many students and teachers using the bulk import feature in EasyBridge. For the existing template, an extra step for the information to be sent to the correct location in EasyBridge for the organization.
Follow the steps below to download the template provided in EasyBridge. Update the template with the school or district roster information to import students and teachers in bulk.
- Log in to EasyBridge using the administrator credentials and navigate to the Accounts page from the Users drop down menu.
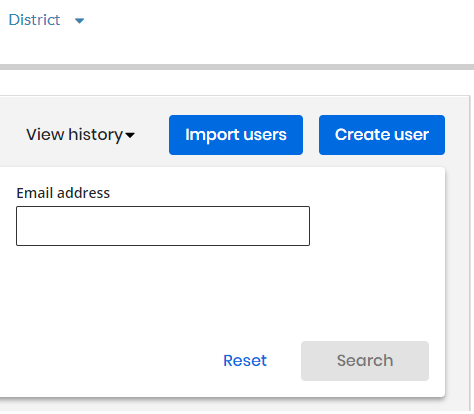
- Select the blue Import users button on the right side of the page.
- Select the type of users to upload Teachers or Students then select Next.
Uploading students requires to check the box that have read the PII data acknowledgment.

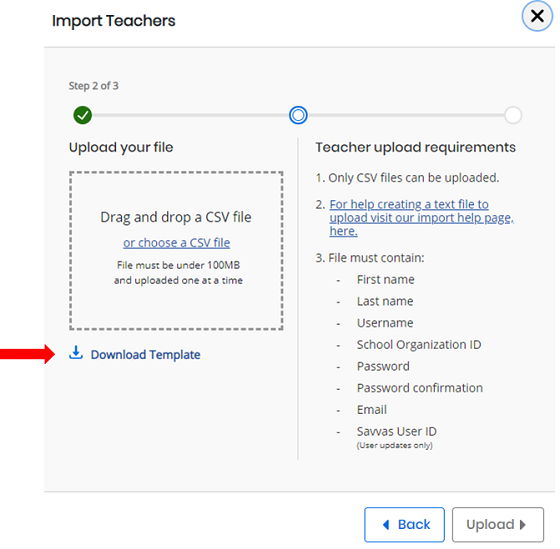
- Select Download Template under the Upload your file section, located in Step 2 of 3 in the EasyBridge import process.

-
Open the spreadsheet and populate the data to import back to EasyBridge. Required fields for each user are the following:
- First name
- Last name
- Username
- School Organization ID - for adding more than one school to a user in the import file, separate each SavvasSchoolID with the pipe character "|".
- Password
- Password confirmation
- Savvas User ID (for updates only)
- Save the updated spreadsheet as a .csv to import users to EasyBridge.
- Follow Steps to import rosters.

Steps to import rosters
After downloading the template from EasyBridge and added user information, follow the steps below to import rosters with EasyBridge.
- Login to EasyBridge using the administrator credentials and navigate to the Accounts page from the Users drop down menu.
- Select the blue Import users button on the right side of the page.

- Select the type of users to upload Teachers or Students and then select Next.
Uploading students requires to check and have read the PII data acknowledgment.
- Choose the .csv file to upload, or drag and drop the file onto the square under Upload your file. Select Upload to continue or Back to return and edit the previous step.
For instructions to download the template and create a new file to upload, go to Steps to create a .csv file to import located on this page.
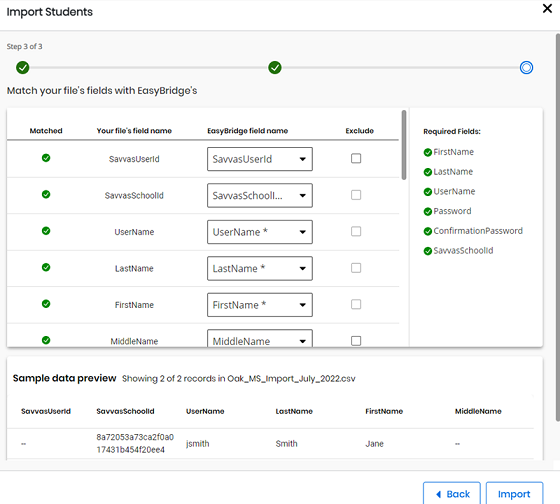
- Review and match the file's fields with the fields in EasyBridge. Field name headers that come directly from the template are recognized by EasyBridge automatically be matched. EasyBridge attempts to match field name headers from a spreadsheet other than the template. Change these by using the drop down menu under the EasyBridge field name column if the match is incorrect.

When all columns are match, select the Import button. A small pop-up message appears at the bottom of the page, Your import is in progress. along with an Import history button.
If any of the required fields are blank or missing for a user, none of the fields are imported for that user. - Select Import history to see the status of the import.
See also